Connecting and configuring iSCSI on Windows Server

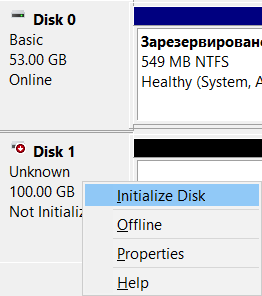
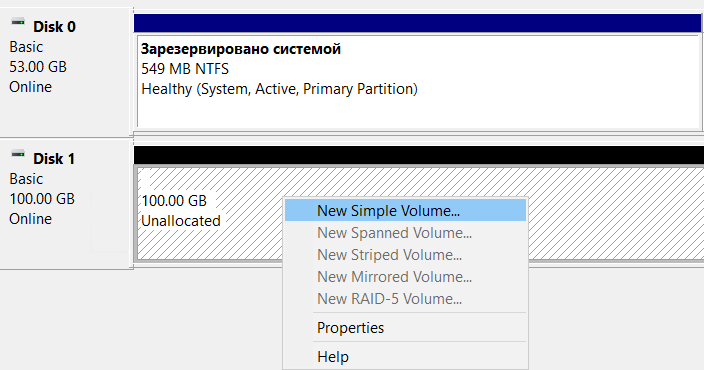
This is an instruction for connecting an iSCSI disk in Windows Server 2016. When ordering an iSCSI storage service in SIM-Networks, you will receive a message similar to the one below (note that the numbers in the server address may differ from the illustration example, and instead of the letters X,Y, or Z in the message will indicate the real values to configure your access):

The "iSCSI Backup" service is activated. Access options:

Server address (iscsi-target): 185.59.101.184 Login: YYY Password: ZZZ Access to the service is currently limited to only one IP address - XXX.XXX.XXX.XXX

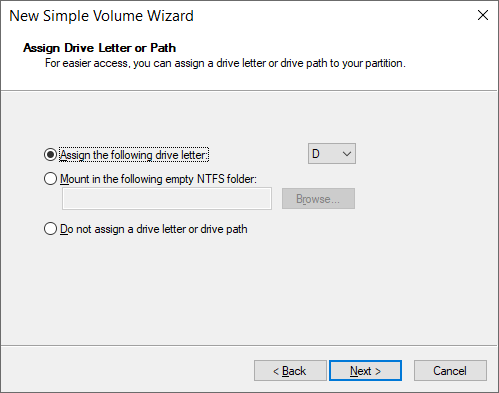
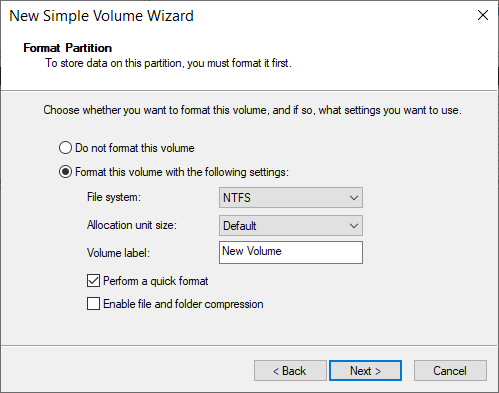
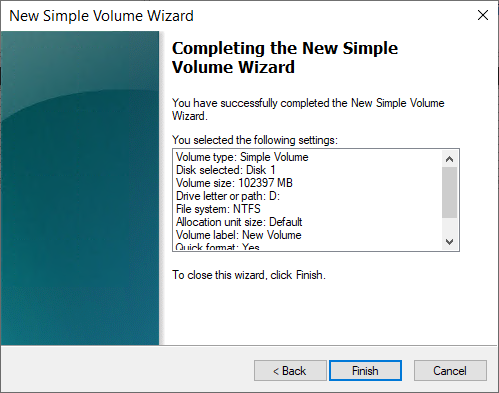
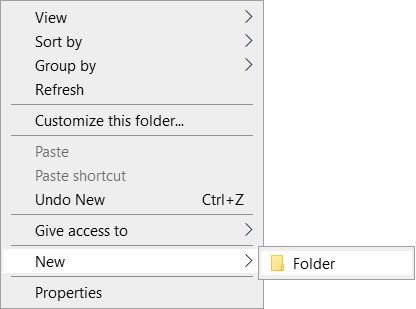
Connecting an iSCSI drive

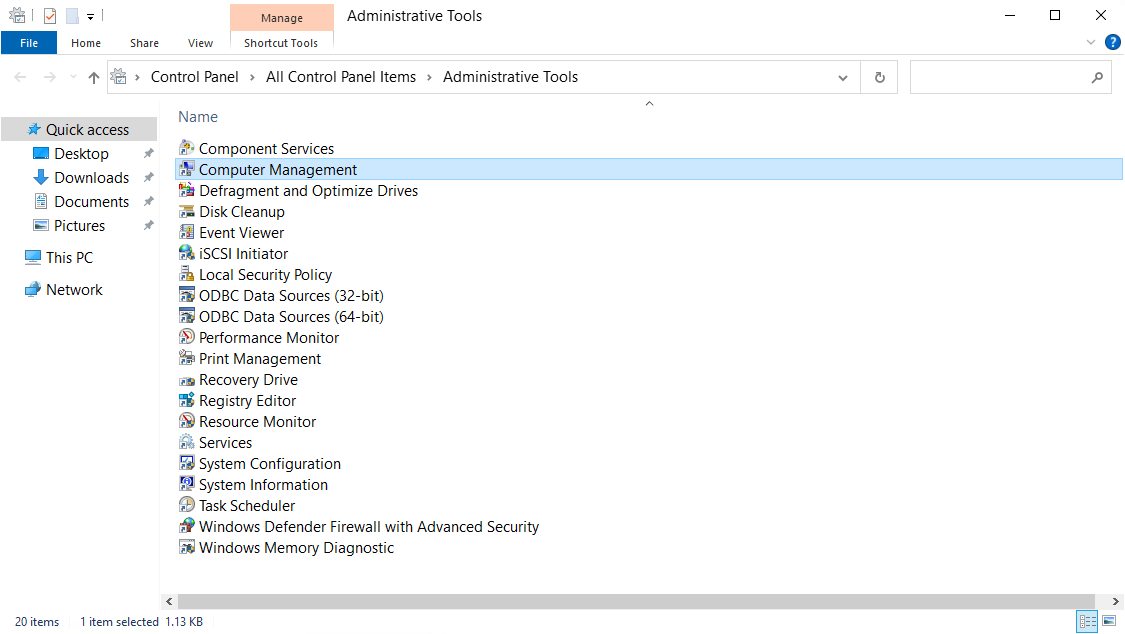
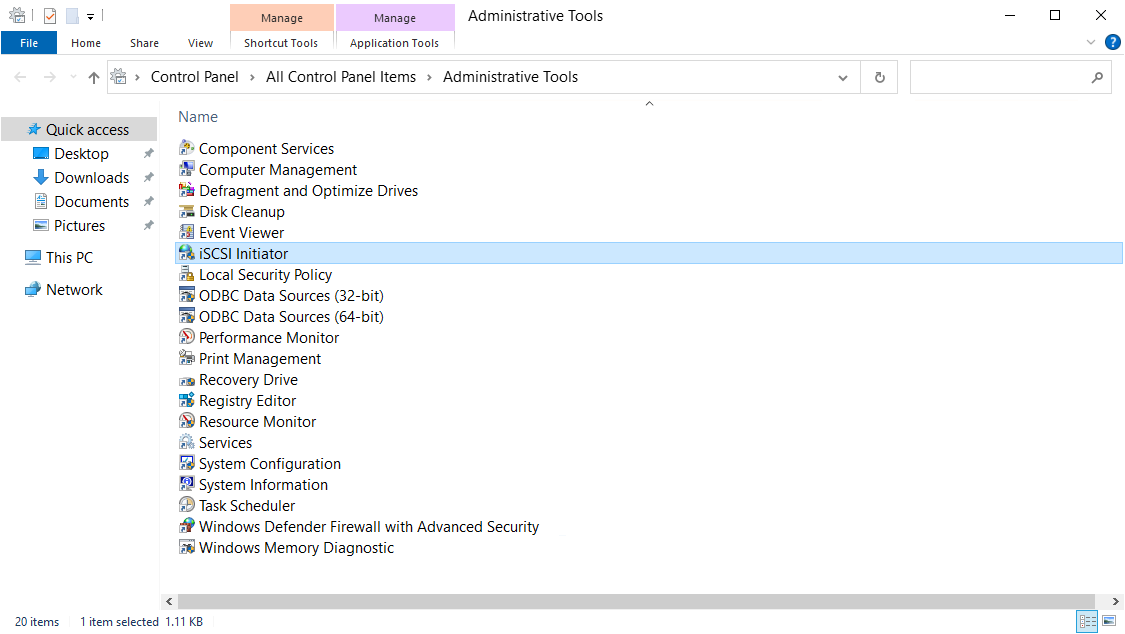
1. Go to "Control Panel -> Administrative Tools" and launch the iSCSI Initiator.

Подключение iSCSI

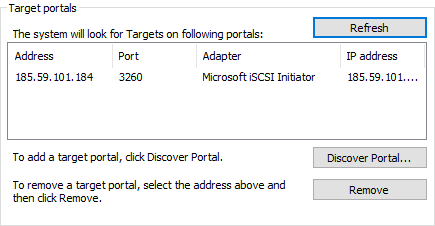
2. In the Properties section of the iSCSI initiator, click the Discovery tab and click the Discover Portal button.

Подключение iSCSI

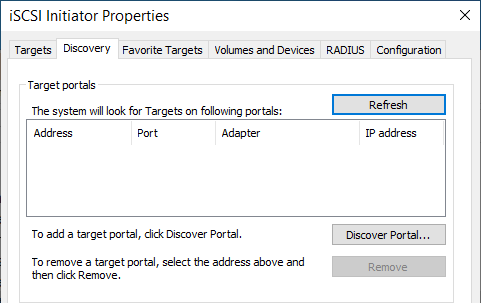
3. In the window that opens, fill in the "IP address" field of the iSCSI server.

Подключение iSCSI

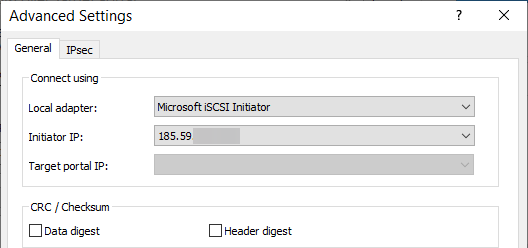
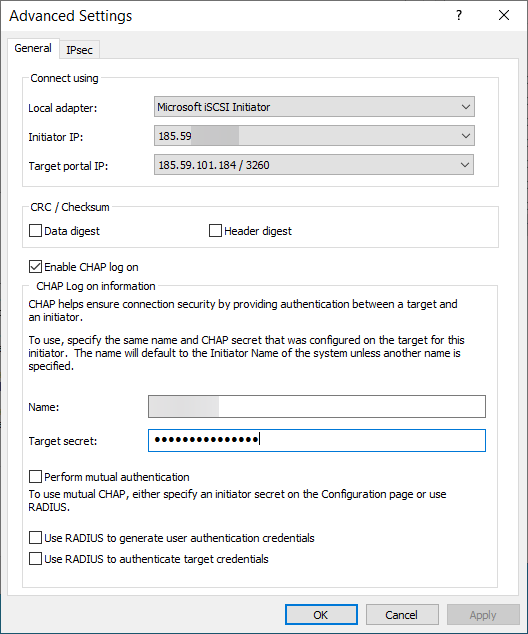
4. Open the advanced server connection settings section (click the "Advanced" button). Select the Local Adapter and Initiator IP address as shown in the figure below (where Initiator IP is the IP address of your local network adapter that is allowed to connect to the iSCSI server).

Подключение iSCSI

5. Save your settings, make sure you get an image like the one below:

Подключение iSCSI

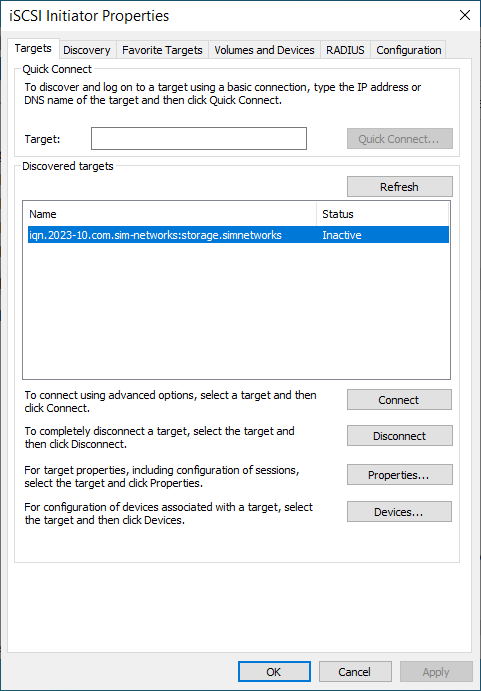
6. In the Properties section of the iSCSI initiator, click the Targets tab, select the inactive object that appears, and click the Connect button.

Подключение iSCSI

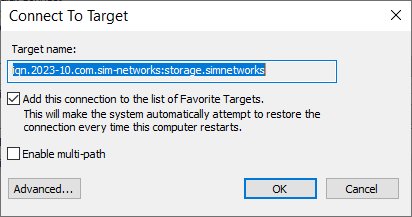
7. In the "Connect to target" window that opens, click the "Advanced..." button

Подключение iSCSI

8. Fill in the fields of the section, as in the figure below. The parameters "Name" and "Secret" are the "Login" and "Password" from the letter sent to you when activating the service.

Подключение iSCSI

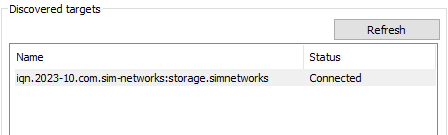
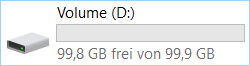
9. Save your settings. Verify that the value of the State field of the discovered target is Connected, as shown in the figure below. Exit the Properties section of the iSCSI Initiator, saving the settings.

Подключение iSCSI

Initializing and Formatting an iSCSI Drive

The connected iSCSI drive must be prepared for use (initialized and formatted).

10. In the "Administration" section, open the "Computer Management" tab.

Подключение iSCSI

11. Go to the "Disk Management" section.

Подключение iSCSI

12. Make sure that your drive is displayed, its status is "Offline".

Подключение iSCSI

13. Select "Online" from the context menu.

Подключение iSCSI

14. Initialize the drive.

Подключение iSCSI Подключение iSCSI

15. Check that the status of the disk has changed to "Online", but there are no partitions and no file system on it.

Подключение iSCSI

16. From the context menu on an unallocated disk, select "Create a simple volume".

Подключение iSCSI

17. After the Create Simple Volume Wizard opens, click the Next button.

Подключение iSCSI

18. Specify the partition size in the corresponding field, or leave the default value unchanged (if you need to use the entire disk for one partition).

Подключение iSCSI

19. Assign a drive letter to the new partition.

Подключение iSCSI

20. Select the file system type and volume label.

Подключение iSCSI

21. Click the "Finish" button and make sure the formatting of the volume is complete.

Подключение iSCSI

Important! During formatting, a window may appear asking you to format the disk. You must ignore this request, close the window and wait for the formatting to complete.

22. Verify that the new volume is in a Healthy state.

Подключение iSCSI

23. Verify that the new volume is displayed among the drives in Explorer.

Подключение iSCSI

Dedicated Server

Dedicated server

Check out SIM-Networks’ powerful pre-made server configurations

See packages

Checking the availability of an iSCSI disk for writing

24. To check the volume, go to the corresponding drive in the "Explorer" and create, for example, a text file, as in the figure below:

Подключение iSCSI

25. Verify that there were no problems creating the file - this means that the new iSCSI volume is connected, formatted, and working properly.

Подключение iSCSI

Was this article helpful?

Tags:

#server

Did you like the article?

Cookie consent

By clicking «I agree», you consent to our website's use of cookies to give you the most relevant experience by remembering your preferences and repeat visits. However, you may visit «Manage сookies» to provide controlled consent. Learn more

Cookies settings

functional

Necessary cookies are crucial for the basic functions of the website and the website will not work in its intended way without them.

Analytics

Analytical cookies are used to understand how visitors interact with the website.

Advertisement

Advertisement cookies are used to provide visitors with relevant ads and marketing campaigns.