Instructions for migrating sites to a new hosting platform

Step 1: Analyze the data to be migrated

This is an important step that cannot be neglected. It will allow:

  • avoid errors during the transfer process;
  • exclude from migration irrelevant data that does not need to be transferred;
  • do not miss such important points from the migration process as mail domains and mailboxes, cron tasks, redirects, SSL certificates, etc.

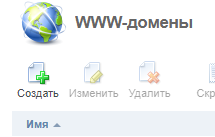
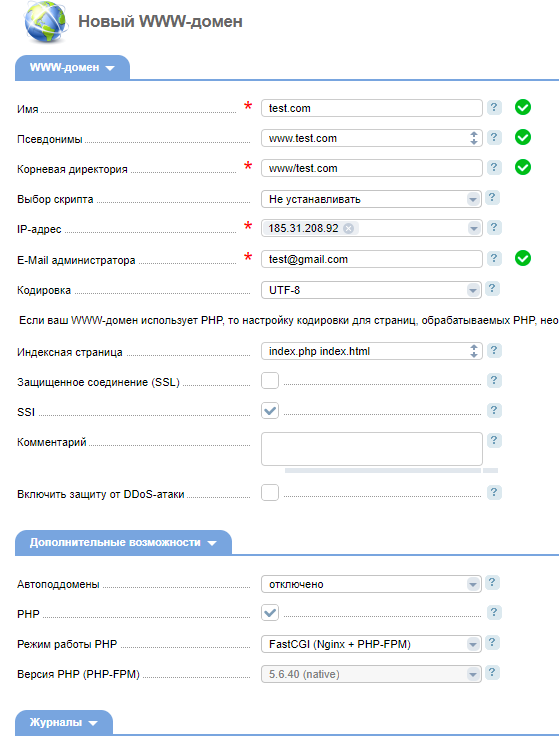
Starting the process of a site migration to a new server, first of all, we will analyze your current configuration on the old server. We go to the hosting control panel on the old server at: https://vh2.sim-networks.com/ispmgr, enter the login/password and in the "World Wide Web" → "WWW domains" section we look at the entire list of available WWW domains. We make for ourselves a list of domains that need to be transferred. If some domains are no longer relevant, they must be excluded from migration - this will significantly speed up the process itself, and will also allow you not to occupy disk space and resources for them on the new server.

Let's go to the "Main" → "Domain names" section, select the desired domain with a single click, and click the "Records" button. You can see an example in the screenshot below:

Domain Control Panel

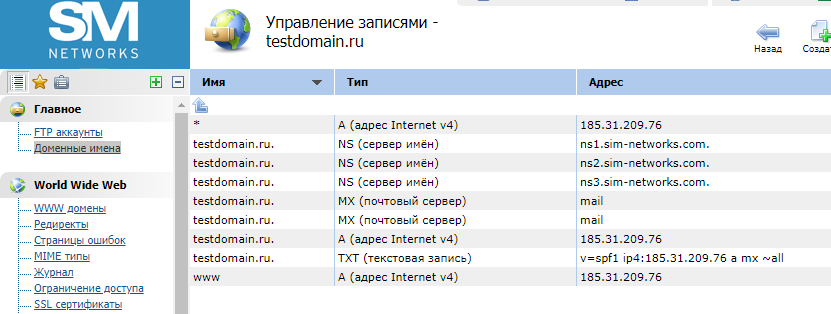
Of these records, we need to save DKIM records and others in any convenient form that relates to keys to mail services, setting up subdomains, etc.

The "World Wide Web" → "Redirects" section contains a list of previously configured "URL Redirects". If it is empty, we skip it. If it contains data, it is necessary to analyze its content.

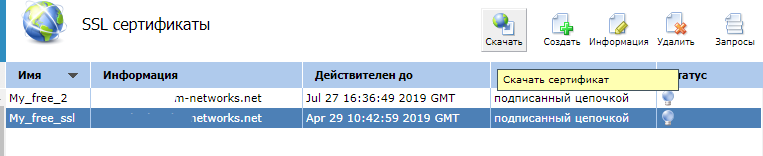
Then go to the "World Wide Web" → "SSL Certificates" section and save all the current certificates: select the desired certificate with a mouse click, after which a panel with options will appear at the top right. It allows you to save the selected certificate by clicking the "Download" button:

Download SSL certificates

In the "E-Mail" section, we analyze the contents of the "Mail domains" and "Mailboxes" subsections, and also compile a list of mailboxes that need to be transferred, and exclude those that have lost their relevance.

In the "Tools" → "Scheduler (cron)" section, we look for the presence of cron tasks and determine their need in the future.

At this stage, the analysis is completed. Let's move on to the practical part of transferring your site.

Stage 2. Creating an archive of site files and a dump (snapshot) of the database on the old server

This stage consists of two consecutive actions: saving the database and saving the site data.

2.1. Saving the database

To get a dump (cast) of the site database, you can use two methods.

Method one:

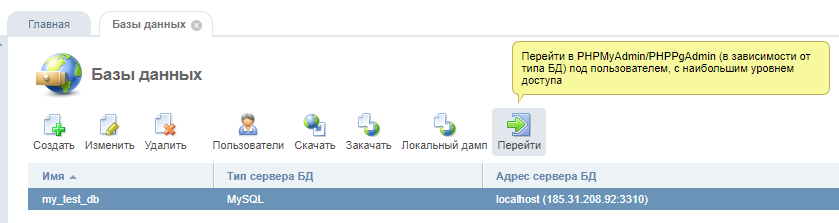
In the hosting control panel (we entered it at the previous stage), go to the "Tools" → "Databases" section. We select the database (if there are several, this operation must be done for each of them) and click the "Download" button in the upper right. Thus, we will save a file in sql format to our computer, which is a snapshot of this database, and later we will be able to restore it from it on a new server.

Method two:

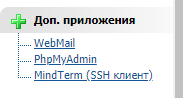
In the control panel in the "Add. applications" there is an item "PHPMyAdmin":

Additional applications in the domain control panel

Select it and get into the control panel:

Login to phpMyAdmin

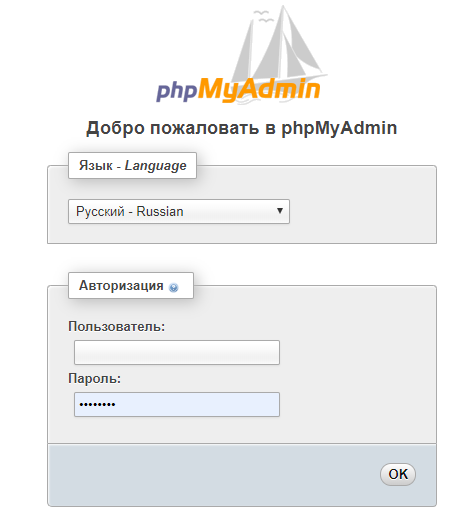
Enter login and password. An important nuance: if you do not remember your login password to the site database, then you can see them only in the configuration file of your site, for example, for WordPress, this is the “wp-config.php” file, which is located in the root directory of the site. In the site control panel itself, they can only be changed, the current password cannot be displayed, so we are looking for the following lines in this file (DB_NAME, DB_USER, DB_PASSWORD):

Finding login details in phpMyAdmin

This is the name of our database, login, and password. It is these login and password that we enter in the PHPMyAdmin login window.

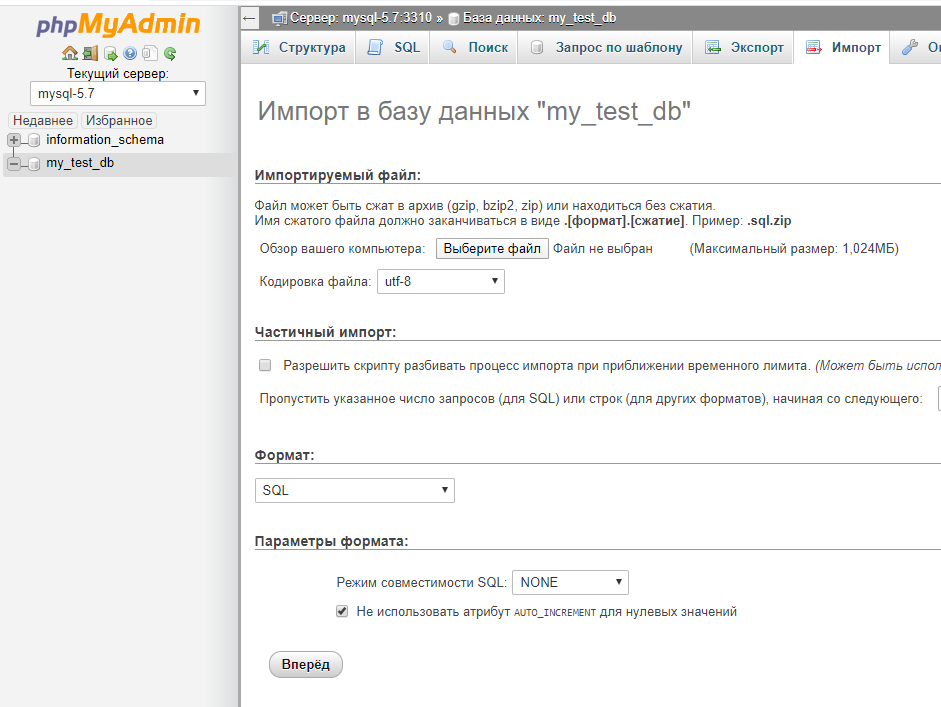
Then select the database that is connected to your site and go to the “Exporttab (2):

Export site database

After that, select “Quick” copy mode and “SQL” format, then click the “Go” button and save the file. So, the database dump has been created and we can transfer it to the new server:

Database dump

2.2. Download site files

You can also download an archive with your website files to your computer in two ways.

Method one:

Go to the "Maintenance" → "Backups" section. We select a backup copy for the day you are interested in with a single click and click "Download" in the upper right.

Keeping a site backup

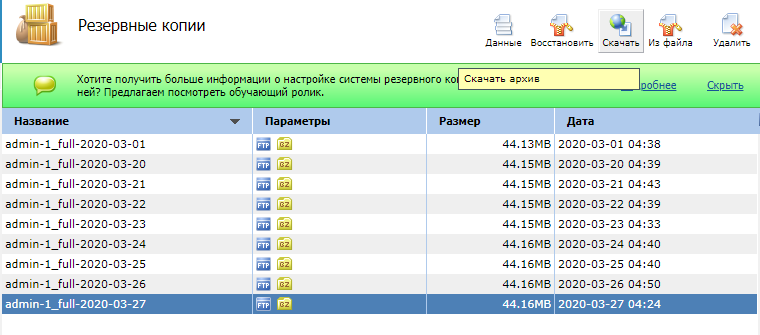
This archive contains all the files of your sites, even if you have several of them. From it, you can restore any of them. In addition, it contains an archived copy of the mailboxes.

Method two:

It involves more actions on the part of the user but allows you to download only what you need (the first way you download an automatically created archive of all the content for all your domains by the system in one archive file). So, let's go to the service control panel. In the “FTP-Users” item, check if your FTP user has permission to access the files on your site. If not, you must either change them or create a new user. To work with your sites via FTP, you can use free programs or browser plugins, such as FileZilla or WinSCP.

Next, go to your site via FTP and copy all the content to your computer. Also, make sure that you are in the root folder of the site - because absolutely all files are needed for the transfer.

If you need more detailed instructions on working with site files via FTP, you can find them in our wiki.

Now that you have both the site files and the database, you can start migrating your web resource to the new platform.

Step 3: Restore the database on the new server from the dump created in step 2

Go to the hosting control panel on the new maintenance server at: https://vh3.sim-networks.com:1500/ispmgr. Then go to "Main" → "Databases" and click the "Create" button. Fill in the fields as shown in the figure below:

Site database recovery

Fields meaning:

  • Name - the name of the database, it is desirable to set the same name that the database had on the old server;
  • Database server type - by default MySQL (for our hosting platform, the value does not need to be changed);
  • Database server - here we recommend choosing version 5.7 as the most up-to-date;
  • Encoding - utf-8, universal encoding;
  • User - Create a new user. For it, we specify the name and password, preferably the same as on the old server, but new ones are also possible;
  • We also allow remote access to the database.

After that, press the “OK” button.

Important point! You can set the database name to any new value, as well as create a user and password for it with new data that is different from the old server. But don't forget to add this new data to your site's configuration file after you migrate it (eg wp-config.php as described in step 2), otherwise, your site on the new server will not be able to access the database and will not work.

Next, we need to go to PHPMyAdmin to deploy our database from the SQL file created earlier on the old server, because the newly created database is empty. We select our database with a single mouse click and press the "Go" button. We will immediately get into PHPMyAdmin under the user we created and his password - the hosting control panel substituted all this data automatically and you do not need to enter them:

Switching to the new control panel

Select your new database and go to the "Import" tab:

In the "Select a file" field, select the database file that you downloaded from the old platform (the file with the SQL extension). Set all import settings as shown in the figure below (you can allow splitting the import process if your database is very large):

Deploying a database on a new platform

It will take some time for the process of unpacking the database. Upon successful completion, you will see all your tables in the database. This completes the process of transferring the database, and we move on to the next step - transferring the site files. The browser tab with open PHPMyAdmin can be closed, we will no longer need it.

Stage 4. Creating a www-domain on a new server and transferring site files

In the hosting control panel on the new serving server, go to the "WWW" → "WWW domains" section and click the "Create" button

Creating a new www domain

We fill in the fields as shown in the screenshot below, with the difference that instead of "test.com" you should enter the name of the domain that you are transferring. IMPORTANT! Pay attention to the “Root directory” field, it must be specified exactly like this, with “www/domainname”, otherwise the root directory for the site will be created incorrectly and the site will not work:

Transferring domain name data

Note! As for the mode of operation of PHP and its version, they can be changed later through the section of the control panel "WWW" → "PHP".

Click "OK". So, we have our domain, and a directory will be automatically created for it, into which we will upload the files of our site from the archive in the next step.

Go to "Main" → "File Manager" and move to the folder "WWW" → "Your domain name". We remind you that this directory should have been created automatically in the previous step when creating the www-domain; if it is not there, then the domain was not created correctly and you will have to repeat the steps from the previous step, exactly following the instructions.

Site Archive

We press the "Download" button and select either the entire archive that we downloaded to our computer at stage 2, point 2, or only the files of the desired site. After downloading the archive, unpack the files from it into the site directory using the "Extract" button. It is advisable to unpack files from the archive already in the hosting control panel so that the correct owner rights are assigned to these files and folders. ATTENTION! All files and folders that you unpack should end up in the root of the www/your domain name directory, and not in a subfolder (for example, the path www/test.com/test.com will already be incorrect). If this is not the case, then simply move all the files and folders to the desired directory using the Copy / Paste buttons on the top panel, and the subfolder can be deleted.

You can also upload files and folders to a new hosting using the FTP protocol and any FTP client. Before that, you need to create an FTP user for the new hosting, similarly to that described in step 2 for the old server.

Cloud Migration

Cloud migration

Find out how to migrate to the cloud quickly & efficiently

Learn more

Stage 5. Create a mail domain and mailboxes

So, we have already migrated the database, files, and folders of the site, now we should migrate the mailboxes. To do this, in the hosting control panel on the new server, go to "Mail" → "Mail Domains" and click "Create". Fill in the "Domain" field, then click "OK".

Go to "Mail" → "Mailboxes" → "Create". Here we create all the mailboxes we need, the list of which we compiled at the analysis stage. Fill in the fields as shown in the figure below, indicating your mailbox names and selecting your domain in the "Domain" field. The password can be set for each box the same as on the old server if you know it, or you can generate a new one.

Creating mailboxes on a new hosting

After creating the mail domain and boxes in the file manager, the “Email” directory will appear at the root, which in turn will contain a folder with the name of the mail domain and a folder for each mailbox. It is in these folders that you can upload files from similar folders in your archive that you downloaded from the old server. This way you will transfer mail messages to the new server.

Stage 6. Setting up the site on a new server and checking its operation

You need to follow these steps if you have set a new name, new username, or password for the database on the new server that is different from those on the old server.

Go to the root directory of the site in the file manager, find the configuration file of your CMS (for example, wp-config.php) and edit the following lines in it:

  • define('DB_NAME', 'db_name'); – where db_name is the name of your database;
  • define('DB_USER', 'db_user');
  • define('DB_PASSWORD', 'db_pass').

The last parts in the last two lines should be replaced with the new username and password, respectively.

Also at this step, you need to register redirects and cron jobs, which we analyzed at the very first stage if they are still needed. Connect an SSL certificate to the site, if it had one.

The complete list of configuration files for different CMS is given below:

Configuration files for different CMS

It's time to test the operation of our site on the new server without breaking it on the old one. To do this, we need to open a file called "hosts" with any text editor and add a line to it that will redirect us to a new server. For all other users, the site will still open from the old server. So, depending on your operating system, follow the path for Windows: c:\windows\system32\drivers\etc\hosts; for Linux: - /etc/hosts and open it with any text editor. Add the following line to it, as shown in the figure below (where the IP address is the address of the site on the new server; you can see it in the "WWW domains" section of the site control panel), then write the domain name separated by a space. We save. Thus, only for us, this domain will be loaded from the new server and we can check its operation and fix errors if they are found. If the site is working correctly, then this line from the “hosts” file must be deleted and you can proceed to the last step, namely, deleting DNS records on the old server.

Site migration instruction

Step 7: Disable the domain on the old server

We return to the old hosting server in the control panel and go to "Main" → "Domain names". Here we find our domain, which we transferred to the new server, select it and click the "Delete" button. We mark all the items, as shown in the figure below:

Disable domain on strom server

After that, our site with all its content will be completely deleted on the old server. Then for some time (from 1 to 4 hours), the site will be unavailable on the Internet until the records on the DNS servers in the world are updated. When this information is updated, the site will be available to all users on the Internet from the new site.

Was this article helpful?

Did you like the article?

Cookie consent

By clicking «I agree», you consent to our website's use of cookies to give you the most relevant experience by remembering your preferences and repeat visits. However, you may visit «Manage сookies» to provide controlled consent. Learn more

Cookies settings

functional

Necessary cookies are crucial for the basic functions of the website and the website will not work in its intended way without them.

Analytics

Analytical cookies are used to understand how visitors interact with the website.

Advertisement

Advertisement cookies are used to provide visitors with relevant ads and marketing campaigns.